-
Equipments
-
-
NEWS
- Double planetary mixer new t...
- Multiple paddle options of D...
- Double planetary mixer is th...
- Multiple mixing tanks with d...
- Double planetary mixer for c...
- Double planetary mixer can b...
- Double planetary mixer has E...
- Double Planetary Mixer Excel...
- Principle of asteroid rotati...
- Efficient and uniform mixing...
-
Contact Us
Or Contact Info
-
Coating
-
-
NEWS
- Double planetary mixer new t...
- Multiple paddle options of D...
- Double planetary mixer is th...
- Multiple mixing tanks with d...
- Double planetary mixer for c...
- Double planetary mixer can b...
- Double planetary mixer has E...
- Double Planetary Mixer Excel...
- Principle of asteroid rotati...
- Efficient and uniform mixing...
-
Contact Us
-
Adhesives
-
-
NEWS
- Double planetary mixer new t...
- Multiple paddle options of D...
- Double planetary mixer is th...
- Multiple mixing tanks with d...
- Double planetary mixer for c...
- Double planetary mixer can b...
- Double planetary mixer has E...
- Double Planetary Mixer Excel...
- Principle of asteroid rotati...
- Efficient and uniform mixing...
-
Contact Us
-
Agrochemistry
-
-
Agrochemistry
- Emulsifiable Concentrate
- Suspension Concentrate
-
-
-
NEWS
- Double planetary mixer new t...
- Multiple paddle options of D...
- Double planetary mixer is th...
- Multiple mixing tanks with d...
- Double planetary mixer for c...
- Double planetary mixer can b...
- Double planetary mixer has E...
- Double Planetary Mixer Excel...
- Principle of asteroid rotati...
- Efficient and uniform mixing...
-
Contact Us
-
Battery
-
-
Battery
- Battery Slurries
-
-
-
NEWS
- Double planetary mixer new t...
- Multiple paddle options of D...
- Double planetary mixer is th...
- Multiple mixing tanks with d...
- Double planetary mixer for c...
- Double planetary mixer can b...
- Double planetary mixer has E...
- Double Planetary Mixer Excel...
- Principle of asteroid rotati...
- Efficient and uniform mixing...
-
Contact Us
-
Cosmetic
-
-
Cosmetic
- Lipstick
- Eyebrow Pencil
- Ointment
-
-
-
NEWS
- Double planetary mixer new t...
- Multiple paddle options of D...
- Double planetary mixer is th...
- Multiple mixing tanks with d...
- Double planetary mixer for c...
- Double planetary mixer can b...
- Double planetary mixer has E...
- Double Planetary Mixer Excel...
- Principle of asteroid rotati...
- Efficient and uniform mixing...
-
Contact Us
Sand mill-14 common faults and repairs
During the use of the sand mill, the coolant, feed pump, main motor, internal and external scrapers, thermal relays, etc. occasionally encounter some difficult problems, including machine parts failure, improper operation, and other problems.
1. Reduced or no mechanical seal coolant flow
Reduced coolant flow
Problem 1: The impurities in the coolant are adsorbed on the filter screen of the oil inlet by the electric oil pump, causing difficulty in the oil inlet and reduced oil output.
Solution: Open the cover on the top of the machine base, lift the electric oil pump inlet pipe from the oil tank, and remove the impurities on the filter.
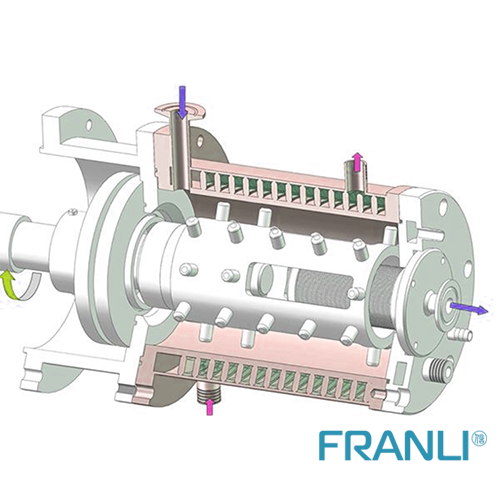
Problem 2: When the mechanical seal spring compression or spring pressure is too large, the coolant temperature increases, and the electronic components in the electric oil pump have poor thermal stability. At this time, the working frequency of the electric oil pump decreases, and the coolant flow decreases.
Solution: reduce the number of springs.
Note: The number of reduced springs must be a multiple of 2, 2, or 4 or 6 and the number should be reduced symmetrically.
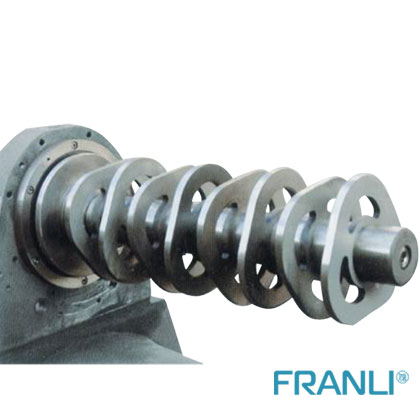
No coolant sprays out of the oil cover on the machine base
The electric oil pump does not work (the oil pump does not shake)
Question 1: The plunger in the electric oil pump is blocked by impurities in the oil and cannot move (you can feel the electromagnet of the electric oil pump move when you touch the electric oil pump at the moment when the pump is turned on, and then there may be very slight shaking if there is no movement).
Solution: Remove the end of the oil outlet cover of the electric oil pump, observe whether the plunger is stuck, and clean it.
Question 2: The electronic components in the electric oil pump are damaged (the power indicator of the electric oil pump is on at this time).
Solution: Replace the pump or repair the electronic circuit part of the pump.

Question 3: The 24V DC air switch protection in the electrical box (the solenoid valve does not operate at this time, there is no sound) Solution: Check whether the solenoid valve and the electric oil pump are short-circuited.
Question 4: The 24V DC regulated switching power supply has no output, and the green indicator on the regulated switching power supply does not light up.
Solution: Check whether the 220V AC air switch is protected and whether the overcurrent protection of the thermal relay of the main motor is activated. If it starts (at this time, the two normally-on terminals under the thermal relay red button have been connected, one of which does not have 220V, and both terminals are life under normal conditions) press it, or wait half an hour for automatic recovery.
The electric oil pump can move (electric oil pump shakes) but the circulating coolant does not come out.
Problem 1: The electric oil pump can move (electric oil pump shakes) but the circulating coolant does not come out.
Solution: the oil inlet filter is completely blocked or the check valve in the electric oil pump is not Action, clean the filter screen or the one-way valve in the oil pump.
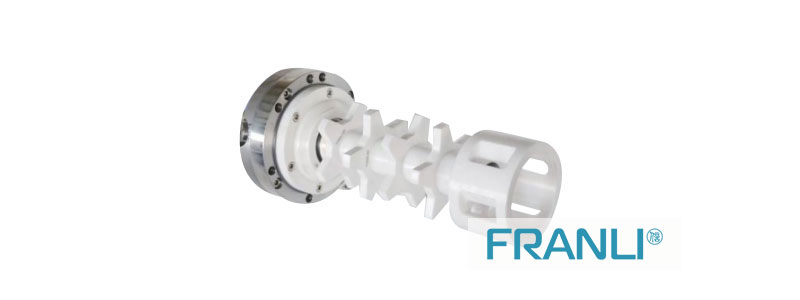
2. The coolant flows out from the bottom of the base cylinder
If there is oil flowing from the bottom of the cylinder, do not worry that the oil will run into the material. The reason is that when the sand mill is working, the pressure of the material in the cylinder is higher than the pressure of the coolant in the oil hood, so there is only the possibility of the material entering the coolant of the oil hood.
When the sand mill is stopped and not in use, the oil cannot enter the cylinder due to the tension of the oil. At this time, the sealing surface of the mechanical seal dynamic and static ring prevents the material from entering the oil.
Problem 1: Oil leaks at the coolant joint connection part on the oil cover. Eyes can directly observe or press the napkin to the root of the joint to observe whether there is oil on the napkin.
Solution: Remove the connector and re-wrap a small amount of fine linen or cotton yarn on the root of the connector thread, and then wrap a small amount of PTFE tape on it.
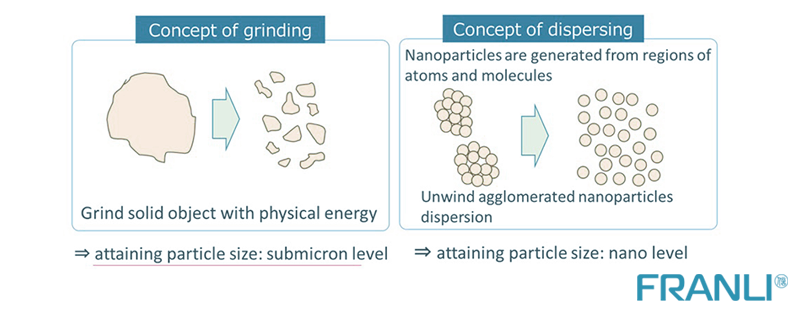
Question 2: Leakage in the oil seal of the skeleton.
After confirming that there is no oil leakage at the coolant joint connection part on the oil hood, wipe off the residual oil under the oil hood, and place a piece of white paper about 25 cm long and 4 cm wide under the oil hood, and observe for 20 to 30 minutes after starting the main engine. Whether the white paper is leaking oil. If there are traces of oil, carefully observe whether it is engine oil or butter. According to the position of the oil trace on the white paper, it is judged whether it is the residual oil or the skeleton oil seal leakage.
Solution: The skeleton oil seal and the mechanical seal moving ring are dynamic seals. A small amount of oil leakage is allowed. A drop of 30-40 minutes is normal. If there is too much leakage, the skeleton oil seal needs to be replaced. At this time, attention should be paid to observing the matching position of the mechanical seal moving ring and the skeleton oil seal, and whether there are deep wear marks on the outer ring of the moving ring. If so, the moving ring and the skeleton oil seal should be replaced together.

Question 3: When the coolant in the oil cover on the machine seat returns to the oil tank, it splashes on the machine seat cover. Due to the tension of the oil, the oil flows in all directions and flows down the discharge pipe.
Solution: Add a plastic film sleeve under the oil cover to prevent oil from splashing around.
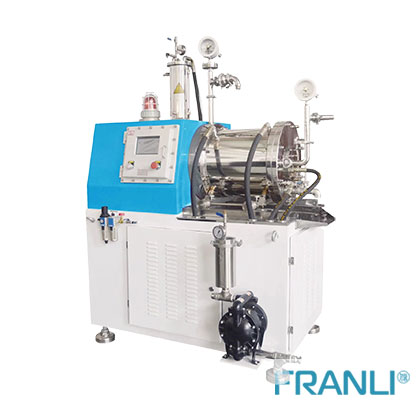
3. The material enters the coolant (the color of the coolant changes with the color of the material)
Question 1: Is it because the mechanical seal spring compression is too large or the spring elasticity is too large, the friction temperature of the dynamic and static ring sealing surfaces is too high, and the lubricating oil film on the sealing surface is damaged, causing.
The sealing surface is dry friction, the sealing performance is greatly reduced, and the material will leak into the coolant under the action of centrifugal force.
Solution: Before installation, the relevant parts should be wiped clean, and the dispersing shaft should also be wiped clean. When installing the discharge end cover (at this time the static ring has been installed on the discharge end cover), the static ring and the shaft should not contact to avoid static The 90-degree acute angle of the ring scrapes the metal on the shaft surface and stays on the sealing surface.
Special attention: the first 5 minutes after turning on the host, it is especially important to listen to the sound of the mechanical seal in the first 2 minutes to see if there is a high-frequency squeaking sound. (Excessive spring compression or elastic force also produces squeaking noise) If there is, it is caused by the two sealing surfaces being dirty when the mechanical seal is installed.
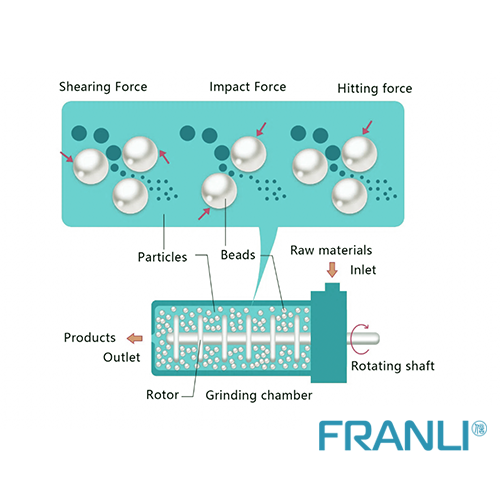
Turn on the main unit without installing the dispersing disk and touch the static ring seat by hand. After about 20 minutes, touch the static ring seat by hand. The temperature should be about 50~55℃. If the temperature is as high as 55~60℃ in 2~5 minutes, you should immediately Shutdown the inspection. Under normal circumstances, the spring compression is about 3mm. If it is too large, the spring seat or the compression moving ring O-ring adjustment pad can be thinned. If the spring compression is less than 2~3mm and the temperature of the static ring seat is very high, the number of springs needs to be reduced.
Note: The number of reduced springs must be a multiple of 2, 2, or 4 or 6 and the number should be reduced symmetrically.
Question 2: The mechanical seal spring force is too small or the compression is too small. When the moving ring rotates with the shaft, due to the bearing clearance and the dispersion of the shaft runout and machine vibration, the moving ring cannot always be in close contact with the static ring, resulting in material leakage Coolant.
Solution: Disassemble the dispersing disc, discharge screen ring, and discharge plate. After turning on the host for 20 to 30 minutes, touch the static ring seat with your hands and the temperature is less than 45°C, especially when it is less than 40°C, it is easy to cause material leakage to the coolant. Behind the mechanical seal moving ring O-ring, moving ring O-ring adjusting pad, mechanical seal spring seat can be added 0.25~2mm thin cushion before and after to increase the pressure of the sealing surface of the moving and static ring, touch the static ring seat with the temperature of about 50~55℃ is suitable.
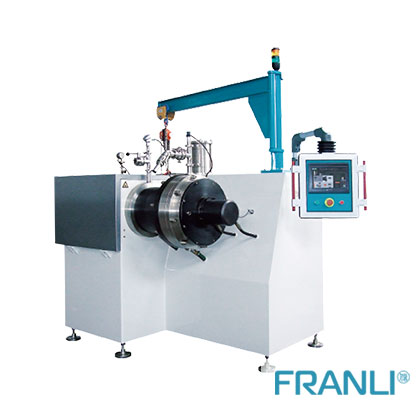
Question 3: The gap between the mechanical seal moving ring and the dispersion shaft is filled with materials and dried up, so that the mechanical seal moving ring cannot float, the material leaks into the coolant through the sealing surface, and the coolant changes color.
Solution: After installing the moving ring, wind 6-8 turns of raw tape in the gap between the moving ring and the shaft to prevent materials from entering the gap between the moving ring of the mechanical seal and the dispersed shaft, so that the moving ring of the mechanical seal can float.
Note: Twist the raw tape into a rope shape, but do not tighten it too tightly. Too much or too tight the raw tape will also prevent the mechanical seal moving ring from floating.
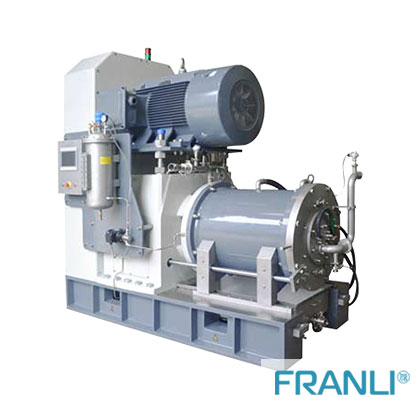
4. Coolant (oil) enters the material
Question 1: Under normal circumstances, it is difficult for oil to enter the material. Only when the static ring O-ring and mechanical seal are severely damaged, the oil may enter the material when the machine is stopped.
Question 2: After installing the mechanical seal, without testing an empty car (referring to the test without dispersing discs and other parts), the cylinder is directly installed and used, and the oil leakage of the mechanical seal cannot be observed.
Solution: When installing the moving ring, pay attention to the two drive pin holes on the moving ring seat and the two drive pins on the spring seat. The matching gap should be large, flexible, and not stuck. You can feel it when you touch the static ring seat when you test an empty car. Twist slightly. When the twist is too large, the oil may flow out from the gap between the stationary ring seat and the discharge end cover. If the oil flows out from the gap between the stationary ring seat and the shaft, the machining accuracy of the mechanical seal surface is not high enough and needs to be re-ground. If the oil flows out from the gap between the static ring seat and the discharging end cover, the matching gap between the two drive pin holes on the moving ring seat and the two drive pins on the spring seat is too small and inflexible. In the ring seat, you can feel that the twisting is very large, and the oil flows out from the gap between the static ring seat and the discharge end cover.

5. The feed pump (diaphragm pump) does not work, and no material can be discharged from the discharge pipe
After the pump start button is pressed, no sound of the solenoid valve can be heard, but the main motor can be jogged.
Question 1: The 24V DC air switch protection in the electrical box (the green indicator light is on when the pump starts, the electric pump does not work, and there is no oil injection in the oil cover)
Solution: Check whether the solenoid valve and the electric oil pump are short-circuited.
Question 2: The 24V DC regulated switching power supply has no output, and the green indicator on the regulated switching power supply is off.
Solution: Check whether the 220V AC air switch is protected? Whether the overcurrent protection of the thermal relay of the main motor is activated. If it starts (at this time, the two normally-on terminals under the red button have been connected, one of which is not 220V, and both terminals are life under normal conditions) press it, or wait for half an hour to automatically recover.

Question 3: The 24V DC regulated switching power supply has no output, and the green indicator on the regulated switching power supply is off.
Solution: Check the 24V DC regulated switching power supply is damaged.
Question 4: After the pump start button is pressed, no sound of the solenoid valve can be heard (there is an oil injection in the working oil cover of the electric pump at this time).
Solution: The solenoid valve is broken. If there are no parts to replace, the intake pipe can be directly connected to the pressure regulating valve.
After the pump start button is pressed, you hear the sound of the solenoid valve, but not the exhaust sound of the diaphragm pump (at this time, there is oil injection in the working oil cover of the electric pump).
Question 1: The O-ring of the main control valve inside the diaphragm pump expands, and the main control valve cannot slide freely. Replace the O-ring of the main valve inside the diaphragm pump. The reason for the expansion of the O-ring of the main control valve inside the diaphragm pump is that the solvent was accidentally sprinkled on the diaphragm pump when it was shut down for cleaning. Follow the micro-holes on the outer surface of the muffler on the diaphragm pump to enter the main control valve), causing the O-ring to expand.
Solution: Wrap raw tape on the connecting thread of the muffler and use a half-section waste polyester bottle to cover the muffler.
Question 2: There are materials behind the main control valve, reversing valve, and diaphragm backing (rubber) of the diaphragm pump. The reason is that the screw pressing the diaphragm in the diaphragm cavity is loose, and the material enters the diaphragm backing (rubber), the reversing valve, and the main control valve, causing damage to the rubber seal and the diaphragm pump not working.
Solution: Remove the inlet and outlet pipes, disassemble the diaphragm chamber covers on both sides, replace the damaged seals, and tighten the compression screws on the diaphragm.
Question 3: After the pump start button is pressed, you hear the sound of the solenoid valve, the small pressure gauge on the adjustment pressure and airflow has a pressure display, and the exhaust sound of the diaphragm pump is not heard or it stops after a sound or two. It looks like a diaphragm on the surface. The pump is broken. The reason for this phenomenon is that after the diaphragm pump sends the material out, the material is blocked at the one-way valve in the pipe that enters the cylinder. The diaphragm pump cannot continue to work due to the reaction force. This phenomenon is caused by the precipitation of the material on the vertical sand mill. Easy to produce.
6. The feed pump (diaphragm pump) is not working properly and the discharge is small (the exhaust sound of the diaphragm pump muffler can be heard at this time)
Question 1: The air pressure is too small or the compressed air flow near the pressure regulating valve is adjusted too small
Problem 2: The feed pipe under the diaphragm pump is blocked by dry material, resin, or other foreign matter. Such as cloth, cotton yarn, plastic braid.
Treatment method: The processed material must be fully stirred and evened. When the material to be processed cannot be fully stirred, the flow rate of the first sanding mill should be increased (playing the role of stirring and pre-dispersing), to avoid sedimentation and blockage.
Problem 3: The feed pipe is broken or the pipe joint is leaking.
Question 4: The one-way valve seat or ball inside the diaphragm pump is abnormally worn, and the one-way valve cannot be closed. The main cause of abnormal wear is that there are more broken beads in the material to wear the one-way valve.
Question 5: The ball of the one-way valve of the inlet and outlet of the diaphragm pump is stuck by foreign matter, and the ball cannot move up and down freely.
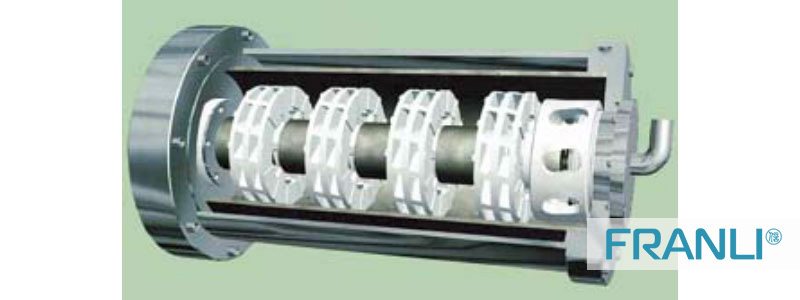
7. Damaged mechanical seal
Problem 1: The coolant is not circulated or the mechanical seal spring pressure is too high, which causes the coolant temperature to increase.
Treatment method: refer to the treatment method of reduced or no coolant flow in the mechanical seal.
Question 2: Impurities in the coolant, damage to the oil inlet filter
Solution: discharge the coolant and clean the fuel tank, filter the coolant and add it to the fuel tank, install a filter.
Question 3: There are impurities on the sealing surface during assembly or the mechanical seal static ring scrapes the metal or impurities of the shaft surface and brings them into the sealing surface during assembly.
Solution: Pay attention to cleaning during installation. Do not stick the static ring on the shaft, and be sure to suspend it with the dispersion shaft.
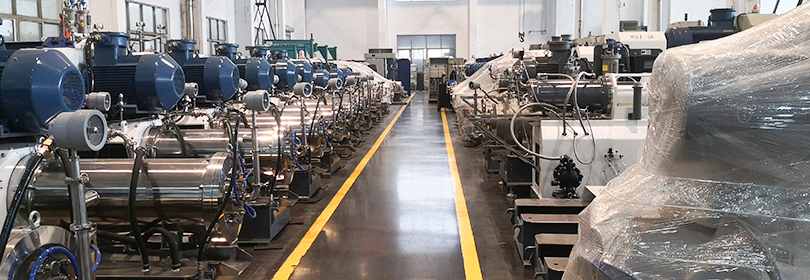
Question 4: The cooling water pressure is too low, and the cooling water does not flow in the copper serpentine coil in the fuel tank.
Solution: Open the upper cover of the machine base and touch the two cooling water pipe joints with your hands. When the water flows normally, there is a temperature difference between the two joints, one cooling and the other hot. If it is all hot, it can be determined that the water pressure is too low or blocked.
8. The main motor does not start
Problem 1: The load is too heavy (the material viscosity is high or the grinding medium is too much), the motor makes a dull sound when the host starts, and the thermal relay starts. At this time, the 24V switch power indicator in the electrical box does not light up, and the feed pump cannot be started.
Solution: Open the electrical box to check whether the current control on the thermal relay is too small. If it is not small, adjust the viscosity of the material or the amount of grinding media.
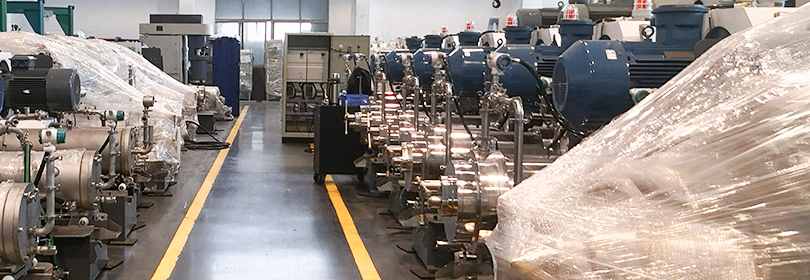
Problem 2: The material viscosity is too large or the grinding medium is increased, the feed speed of the diaphragm pump is too fast, the temperature or pressure setting value exceeds, and the red light on the control surface turns on. At this time, the 24V switch power indicator in the electrical box is on, and the feed pump cannot be started either.
Solution: Adjust the viscosity of the material or the amount of grinding media according to the process needs and production status, and the feed speed of the diaphragm pump (adjust the airflow).
Question 3: The thermal relay is broken, and the 24V switch power indicator in the electrical box does not light up at this time.
Solution: Replace the thermal relay.
Question 4: The thermal relay frequently activates the protection, and the main motor current is less than the set value of the thermal relay.
Solution: Replace the thermal relay.
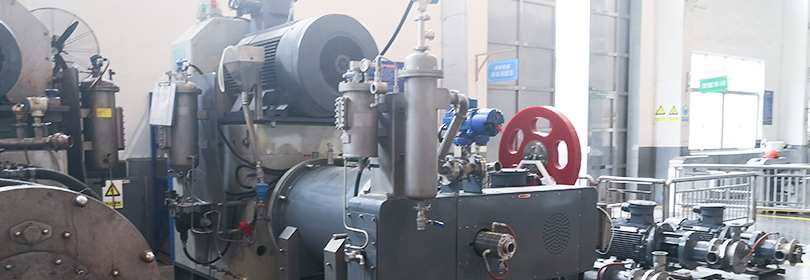
Question 5: The current is very large during the start of the main motor, the motor makes a dull sound, and the thermal relay immediately activates the protection.
Solution: the star and delta conversion is not in place, check the AC contactor and auxiliary contacts.
Question 6: 220V air switch protection or 24V DC regulated switching power supply is damaged and has no output, and the 24V switching power supply indicator in the electrical box does not light up.
Solution: Replace the 24V regulated switching DC power supply.
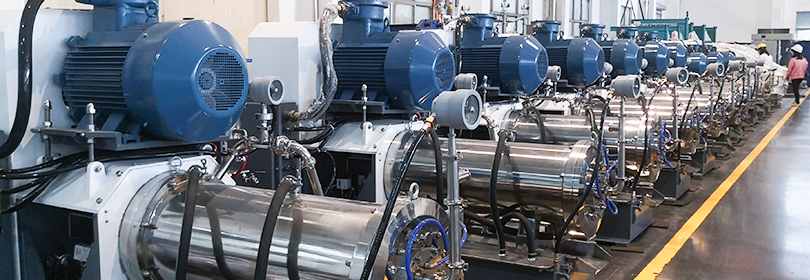
9. Excessive load when starting the main motor
Problem 1: The viscosity of the material is high, the grinding medium is increased or the feed speed of the diaphragm pump is too fast (the pressure in the cylinder is higher than 0.05MP at this time).
Treatment method: reduce the viscosity of the material, reduce the weight of the grinding medium or slow down the feed speed of the diaphragm pump (adjust the airflow size).
Question 2: After starting the feed pump, the main engine cannot be started immediately (the pressure in the cylinder increases at this time, and the main motor emits a dull sound when starting)
Solution: Unload the material plug or rotate the pressure cover above the one-way valve to depressurize. When it is known that there is material in the cylinder, first start the host, press and hold the green button and then start the feed pump (this method is particularly suitable for Materials with high viscosity).
Problem 3: The discharging screen ring is seriously blocked, and the discharging is small or no discharge.
Treatment method: discharge the grinding medium, disassemble the discharging screen ring of the dispersing disc and clean the gap of the discharging screen ring with a thin blade
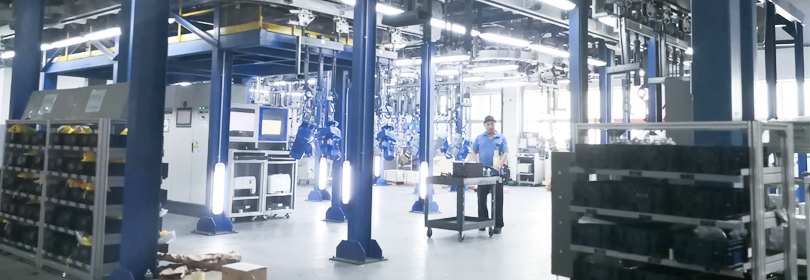
10. Large mechanical vibration
Question 1: The dispersing shaft is permanently deformed when the dispersing disc is installed and the grinding medium is not filled.
Solution: replace the dispersing shaft; adjust the height of the footpads of the fuselage if it is not well adjusted; fill with too little grinding media;
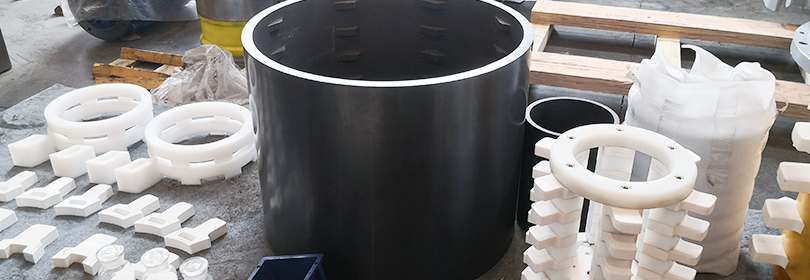
11. Grinding media that is intact or crushed (commonly known as crushed sand) comes out with the material.
Problem 1: The grinding medium comes out with the material and the amount is large. If it is still a good bead, the discharge screen must be damaged by grinding.
Solution: Replace the discharge screen ring.
Question 2: The grinding medium comes out with the material but the amount is not large. Close observation is the state of fine sand. The appearance of broken sand is extremely disadvantageous for the internal and external scrapers.
Reason 1: When the grinding medium is worn to be a little larger than the tip of the scraper gap between the inside and outside of the discharge, the pressure in the cylinder and the gap between the bearings cause the dispersion shaft to jump, forcing the appropriate size of the grinding medium to enter the larger side of the scraper gap. When the dispersion shaft rotates Bring it to the side of the scraper where the gap is small, and crush it together with the material. This will form a vicious circle and enter Increase the gap of the scraper step by step, and the broken sand will be more serious.
Treatment method: regular screening of grinding media
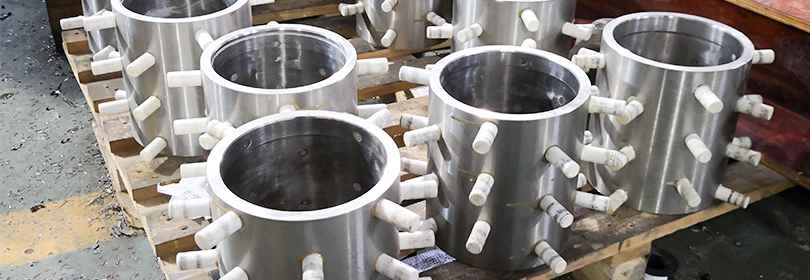
Reason 2: There are bubbles in the grinding medium, and the strength is not enough to be broken by the dispersing disc
Treatment method: replace the high-strength grinding media, and regularly screen the grinding media.
Reason 3: If the dispersing disc is installed reversely, broken sand will be produced.
12. Damaged internal and external scrapers
When the sand is severely broken, the gap between the scraper blades is further increased, and the size of the worn zirconium beads is suitable for the gap between the scraper blades, and the scraper blade is easily damaged.
Treatment method: regularly screen the grinding media to remove broken sand and beads less than 1mm.
13. The main motor makes a dull sound when it starts, making it very difficult to start
Reason 1: The motor lacks a one-phase power supply.
Solution: Use a multimeter to check that the AC contactor has a pair of contacts damaged or poor contact. When replacing the AC contactor, pay attention to the coil voltage of 220V. Some coils have two A1 and one A2 terminal. If both wires are connected to A1, the 220V AC air switch will protect it.
Reason 2: The rotation direction of the spindle was reversed during the test, and the wiring was changed when the phase was changed. (Only for star conversion delta connection)
Solution: It is not allowed to change the line between the AC contactor and the motor, only the incoming line. Method: Press down the blue plastic ring at the port of the compressed air quick-change connector by hand, and at the same time pull out the trachea with the other hand. If you do not use force to press down the blue plastic ring at the mouth of the compressed air quick-change connector, pulling the tube directly will result in damage to the compressed air quick-change connector.
14. The equipment is frequently shut down during operation, and the thermal relay is frequently activated for protection
Solution: carefully observe the pressure in the cylinder when the machine is shut down. If the pressure is large, the main motor current is also large. The reason is that the compressed air pressure is low when the feed flow is adjusted. After the air compressor is started, the compressed air pressure will increase, and the feed flow will increase, causing the pressure in the cylinder to increase. Adjust the minimum starting pressure of the air compressor to be 0.5Kg greater than the use pressure of the sand mill.
Copyright Notice :
This article only represents the author's point of view.
This article is published under the authorization of the author.
Source:
This article address : Sand mill-14 common faults and repairs
Related Suggestion:
Double planetary mixer new type of mixing equipment
Multiple paddle options of Double Planetary Mixer
Double planetary mixer is the first choice for paste materials
Multiple mixing tanks with double planetary mixer
Double planetary mixer for chemical products
Double planetary mixer can be vacuum feeding
Related Products
-

Vacuum Double Planetary Mixer
A Vacuum double planetary mixer is an essential part of any industry to mixing particular material. A double planetary m...
-

Laboratory Double Planetary Mixer
Laboratory double planetary mixer is a kind of non-standardized strong mixing and mixing equipment developed by FLE for ...
-

Hydraulic Lifting High Speed Disperser
The hydraulic lift high speed disperser has the characteristics of simple operation and high flexibility.The hydraulic l...
News
-
28
2023-04
-
28
2023-04
-
28
2023-04
-
28
2023-04
-
28
2023-04
-
28
2023-04
- Tricks About Ointment Mill You Wish You ...
- A deep insight into Sand Mill Machine
- What is the difference between dyno mill...
- How To Choose Vertical Bead Mill or Hori...
- What is a three roll mill machine?
- Specification of high speed disperser an...
- Three Roll Mills: Their mechanism, advan...
- high speed disperser machine application
- Faults and Trouble Shooting Methods of H...
- How to operate High-Speed Disperser


